-
Products
-
Categories
Menu
-
Products
-
Categories
Video: Color Layering Calla Lily Cards | Color Layering With Yana Series
Yana Smakula
Hello, Hero Arts fans! Welcome back for another episode of the Color Layering video series!

In this video & episode, we are taking a closer look at the Color Layering Calla Lily stamp set.
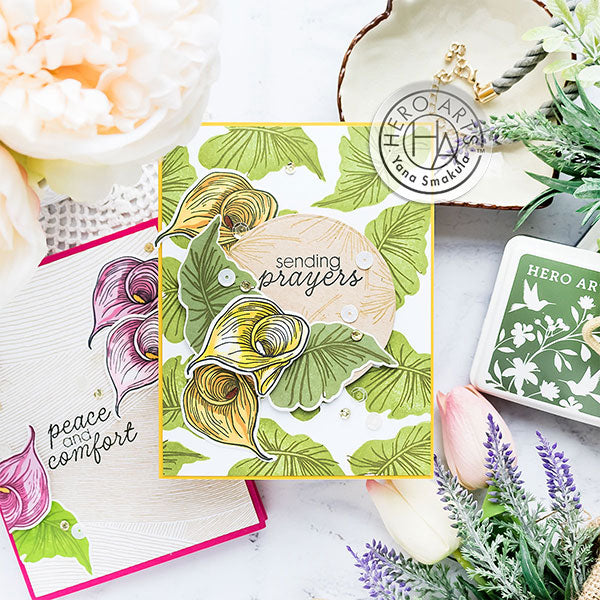
Watch the video tutorial below to learn how I made the cards I'm sharing today.
If you’re having a problem viewing this video, please try watching it HERE in HD on YouTube.
Today I explored stamping images in black or colored outline and also coloring some of the flowers instead of using coordinating layers to add color.
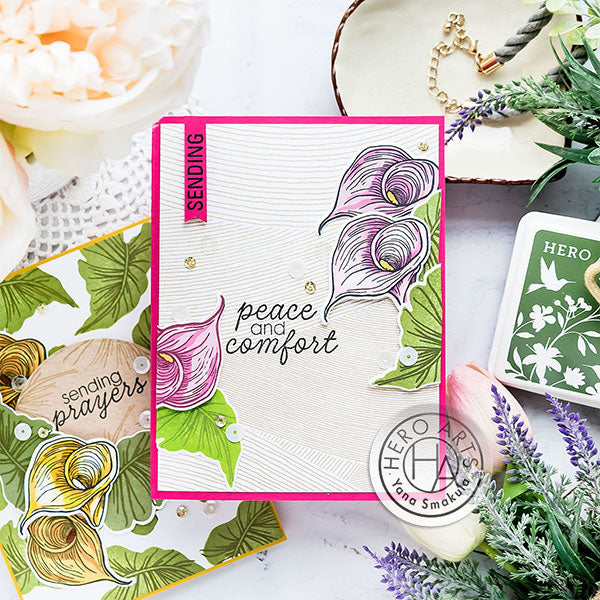
I used Mulled Wine, Rose Madder and Soft Pink colors to stamp the pink calla. On one of the flowers, I swapped Mulled Wine for Black to have a darker outline and thus a lot more contrast to the flower itself.
For one of the flowers, I did not use the layers that come with the stamp set but colored it using Copic markers instead. And this is also something that you can do when you have a layering image and there’s an outline layer to it. I used RV34, RV11 and RV10 markers. It was very easy to color the flower, I followed the layers stamped on the other flowers to see where to add shadows and the only difference I have is I preserved a white highlight on the petals for more contrast.
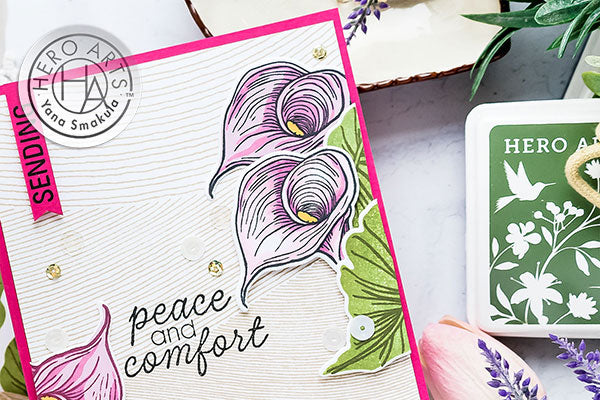
To make a card using these images I stamped Ocean Waves background in Soft Brown ink. After trimming background to 4 x 5 1/4" I adhered it to A2 Azalea card base, adhered flowers, and leaves and added a sentiment. The word "Sending" comes from another set, Smile Stamp & Cut. Finally, I embellished this card using Champagne sequins.
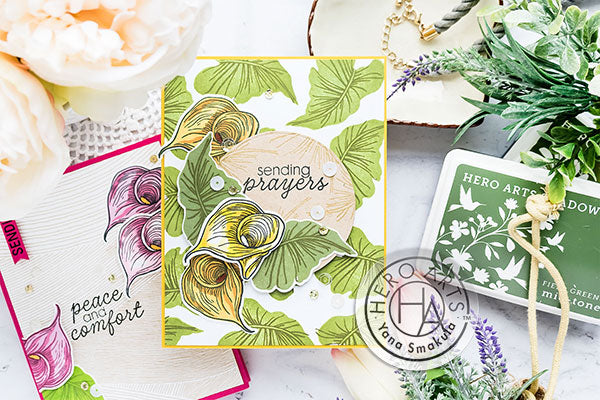
I used the same approach to create a second card I have for you today. I stamped flowers in Black, Butter Bar, and Pumpkin Pie. One flower was colored with the help of Copic markers using Y17, Y35, Y13, and Y08.
You can take any of your color layering images, stamp just the outline, if there is an outline layer, and color that image using your favorite coloring medium for a slightly different look.
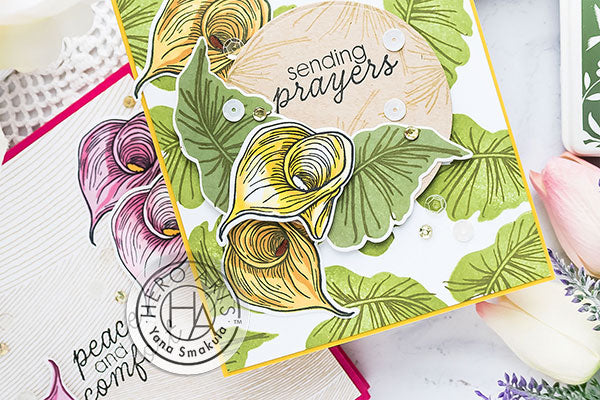
The leaves in this stamp set don’t have an outline layer. There’s a solid and a detail layer to this image. I used various colors of ink here, Green Apple, Moss, Field Green, and Forever Green.
For this card, I wanted to stamp a background using just the leaf image from the Calla Lily stamp set. I used Moss ink for the base layer of the leaf and simply stamped the image turning it each time I made an impression to fill the entire background in. For the detail layer, I used Forever green and stamped it over the leaves to compete them. I love to create backgrounds of this kind - they are easy and quick to make, and they always look impressive on cards.
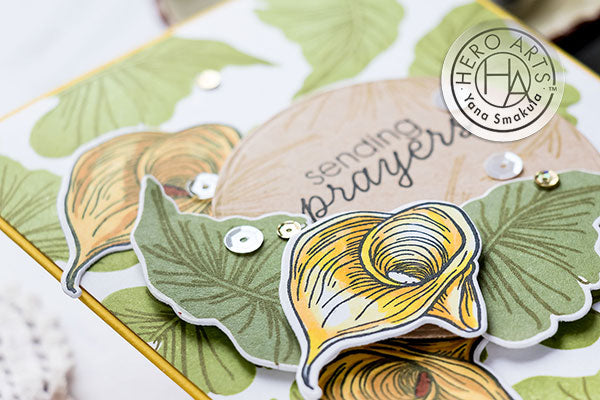
I trimmed my background down to 4 x 5 1/4” and also made an A2 card base for this card using Mustard cardstock. Having arranged the elements on the card front I adhered everything in place once again using glue and foam adhesive squares. Next, I die-cut a circle and stamped my sentiment there framing it with the help of the detail leaf layer stamped in Watermark ink for a tone on tone look. This card was also decorated using Champagne sequins from Hero Arts to complete it.
Have fun stamping!


Pretty cards.
So gorgeous!!
Beautiful cards Yana. Stunning stamp set and a great tutorial video. Thank you so much for an other awesome episode of this series.
What a soft gentle feel to these cards…
Beautiful calla lily cards!