Video: Beach HeroScape | Color Layering With Yana Series
Yana Smakula
Hello, Hero Arts fans! Welcome back for another episode of the Color Layering video series!

In this video and episode, we are taking a closer look at the new Beach HeroScape Color Layering stamp set.
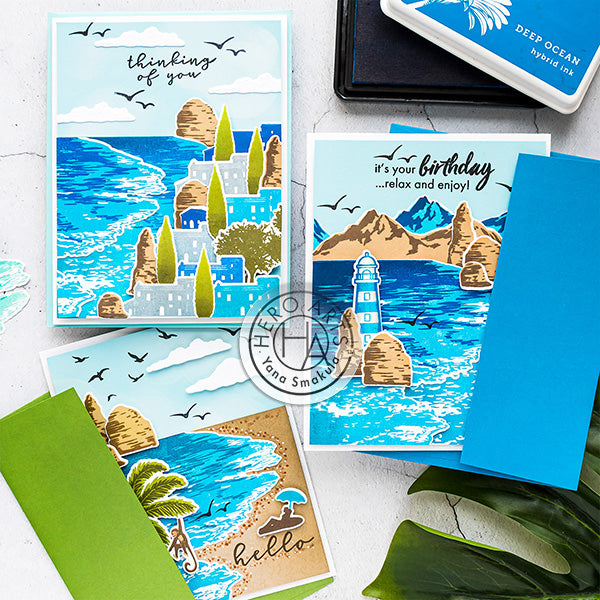
Watch the video tutorial below to learn how I made the cards I'm sharing today.
If you’re having a problem viewing this video, please try watching it HERE in HD on YouTube.
The Color Layering Beach HeroScape stamp set has a gorgeous layering image of the water to help you build a beautiful shore.
Unlike other Color Layering videos I’ve done in the past, in this video I am not going to focus on various colors of ink one can use with this stamp set, instead, I’m going to show you various scene examples one can build using this set. I had the best time stamping these images and going through my stash of stamps and looking for other stamp sets I can combine with this one to create unique scenes for my handmade cards. And I have honestly just scratched the surface of all the various possibilities.
I stamped the water image using several colors of ink to add color variation. I used Splash and Aquatic for the bottom layer, Indigo, and Navy for the bottom layer. I also used Blue Hawaii and Navy for some of the other cards I will share today.
Hero Arts has many ink pads with various shades of blue available, nice true blue color, blue-green colors, very light blues, and very dark blues, so there are several possibilities to stamp this image and make it in any color you like. And you can also go on the wild side and perhaps use sunset or sunrise colors and even stamp the water in pinks and purples.
There is a coordinating die available that will cut this image out. It’s an open edge die, so it will not cut all the way around but will leave the opposite side intact. You can trim that using your paper trimmer or you can use that to your advantage and create a card with a clever opening. You simply have more options with this coordinating die.
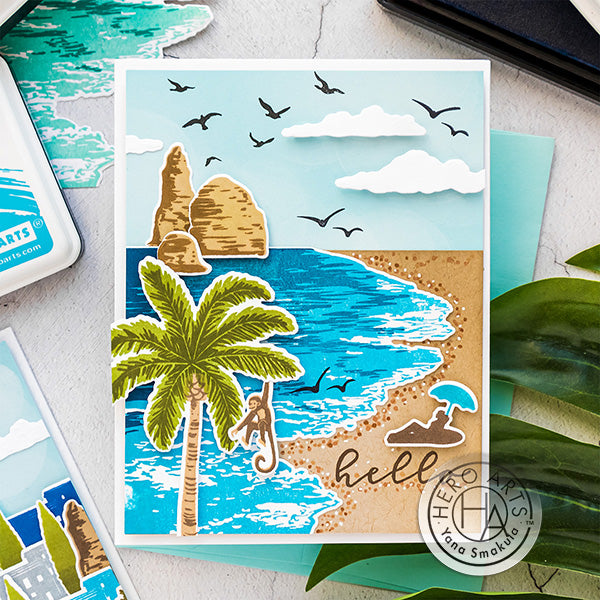
My first project features a simple, basic scene using this stamp set. I created a beach by ink blending Soft Brown ink over the Sand cardstock, I also added dots with Copic markers and a white pen. The sky was made using a panel of Arctic cardstock.

I combined this set with an older Color Layering stamp set from Hero Arts - I used the Color Layering Palm Tree and coordinating dies (watch the video tutorial for this set here) and even added a little money hanging in the tree. I die-cut fluffy clouds using dies from the HeroScape Lavender and Tulip Field sets and stamped seagulls in the sky to complete this scene. So you can see I pulled various stamp sets together to create this scene and it was really fun to do.
For my next project, I decided to add mountains to the horizon line, add a lighthouse to the sea and layer 2 water images to extend the water.
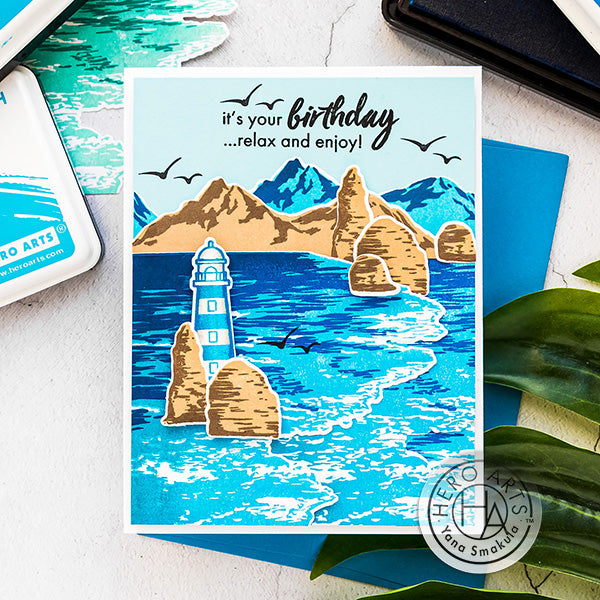
I started with a panel of Arctic cardstock cut to 4 x 5 1/4” and I used glue to adhere the 2 water die cuts onto the panel. I basically extended the water all the way across my card and I just needed 2 die cuts to do that.
Next, I decided to add the mountains to the scene I used the Hero Arts Mountains at the Lake stamp set and coordinating dies. I featured this set in my previous episode and I encourage you to check it out for more stamping ideas. I stamped 2 mountain ridges, one in brown using Cup of Joe and Soft Brown ink and also one in blue using Splash and Navy inks.
I love how you’d sometimes see beautiful rocks coming out of the sea, so I decided to re-create that look on this card and so I added several rocks up at the top and 2 more down at the bottom to create a really rocky shore.
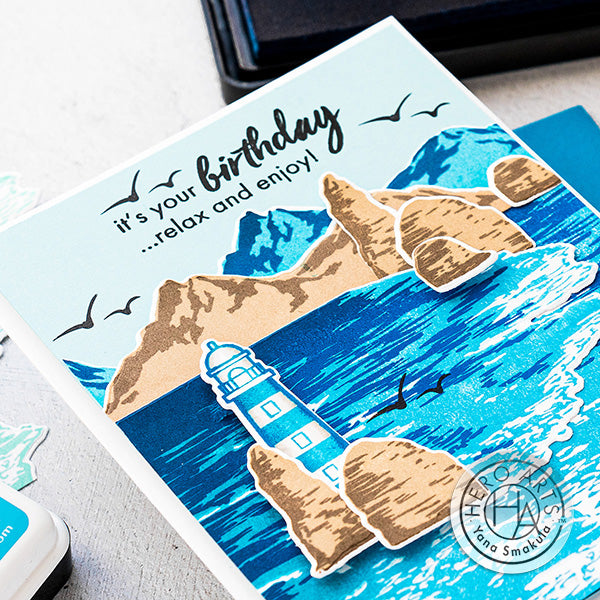
I also wanted to add a lighthouse to this scene, it felt like it would be a nice addition, so I pulled a lighthouse image from another stamp set from Hero Arts, Seas The Day Seagulls set, and I did some creative stamping to add dimension to this image. I first stamped it in Splash ink onto white cardstock. Here I once again used my MISTI stamping tool as I knew I’d need to stamping this image multiple times for the look I had in mind. Next, I used a slightly darker blue, Aquatic ink, and I inked up just the sides of the lighthouse keeping the center portion free from any ink, this added some shading to my image. And lastly, I used even darker blue, Indigo, to have even darker edges of the lighthouse. I double and even triple stamped this image to have the desired look and used a coordinating die cut it out.
I stamped sentiment for this card that reads - "It’s Your Birthday, Relax and Enjoy" and this sentiment comes from the Mountains at the Lake stamp set.
I also stamped several seagulls flying in the sky and also over the sea and I used black ink for that. I foam mounted my panel onto an A2 white side folding card base and that finished this card.
For my next project idea, I was inspired by Mediterranean coastal towns, like Santorini, where the sea is hitting the cliffs and the houses and buildings are scattered up the steep hills.
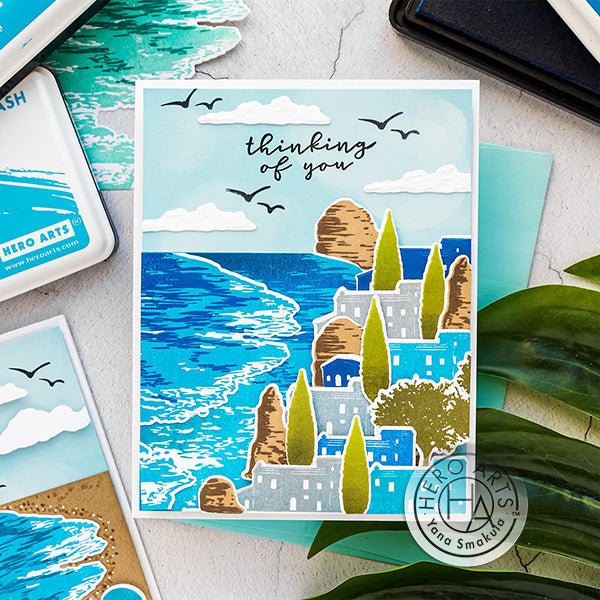
To re-create that look I once again stamped and cut out one water die cut. I also prepared many other die cuts using stamps from Hero Arts Tulip and Lavender Fields HeroScape sets. I stamped and cut out a tree and several clouds from the Tulip set as well as the houses, a large and small houses, several trees and clouds from the Lavender sets. I used the same colors of inks as I did before and stamped the houses in various shades of blue. The trees were stamped using Green Ombre ink and the clouds were simply die cut using coordinating dies, the stamping part was omitted.
To add some softness to my panel I added a bit of white ink with the help of my ink blending tools. I just dabbed white ink directly onto the upper portion of the panel to mimic clouds, I’ve shared this technique before - it is one of my favorites to create a soft sky background.
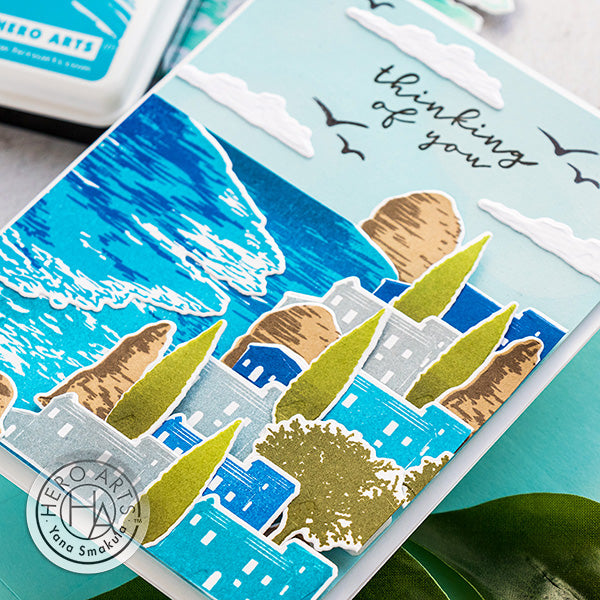
I also stamped and cut out several rocks and I used the same Soft Brown and Cup of Joe inks as I did on the other cards to stamp these images. I adhered water using glue and then worked from the top down adding houses, rocks, and trees having them cascade from the top down onto the card. The trees were mostly used to fill in any gaps and hide the seams between the images.
I stamped a sentiment that reads “Thinking Of You” up in the sky above my scene, I added soft white clouds and also added several stamped seagulls in the sky.
These cards were an absolute pleasure to make and I’m looking forward to using the Beach HeroScape stamp set with other Hero Arts sets again in the future. I can see making many more stunning scenes for my handmade cards.
Have fun stamping!
|


Love this video showing ideas for this fabulous new stamp set! Thanks so much for sharing!!
These cards are absolutely beautiful!!! I love the beach and when I was in better health every summer my husband and I used to find a new beach to visit. These cards bring back wonderful memories.
Gorgeous cards and coloring!
Awesome beach scenes! Love these beautiful cards!
Absolutely adore these cards. I love how you put cards together. I’m really looking forward to my kit arriving.