Two Valentine Cards from One Die
Emily Midgett
Hi there! Emily Midgett here with you today, and I have a twofer featuring the new Love and Florals Fancy Dies! These new dies are so much fun, giving you the option to create custom sentiments, sentiment or shaker windows, and adding the delicate little florals to help accent the sentiment. I have created two different cards with two different techniques, so let's get started with the details!

I knew that I wanted to create a window with a colorful background, so I began by die cutting the Love and Florals Fancy Dies from the center of a white A2 card front, reserving the die cut pieces for another project. I love when you can create two projects using one die cut!

I wanted a colorful window behind the large LOVE opening, so I clear heat embossed the new Heart Shaped Daisies Bold Prints background stamp onto a panel of white cardstock, then used Blending Brushes to blend Ultra Pink and Raspberry Jam inks on the top and bottom of the panel, making sure to fade towards the center. This keeps the color concentration towards the top and bottom of the panel, creating an interesting ombré color gradation.

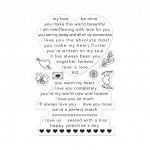
I stamped one of the sentiment clusters from the new Loving Sentiment Strips using Raspberry Jam ink, then cut the sentiments out using the coordinating Sentiment Strips Fancy Die, reserving some of the leftovers for a future project! (Isn't that so handy?) I adhered the LOVE window over the top of the blended background panel using foam adhesive, then added the sentiment strip in the center using some more foam adhesive for extra height.

To accent the sentiment strip, I die cut a few of the floral sprigs from the Love and Florals Fancy Dies from some white Glitter Basics cardstock. This addition of the glitter paper helps to add an extra textural element to the card front and helps distinguish the white background from the white glitter flowers. I adhered the floral sprigs to the card front using Precision Glue. I love how the bright pink background pops from the crisp white card front!

My second card features the "leftovers" from the LOVE window from the first card. I reserved the die cuts themselves and adhered them to a piece of washi tape. I then used Blending Brushes to blend Ultra Pink and Raspberry Jam inks on the top and bottom of the die cut letters to create that pink and white ombré, similar to the color gradient that we created on the first card.

For the background, I die cut the Magnolia Branches Cover Plate Fancy Die from some white cardstock, then adhered it to a white A2 card base using Precision Glue. This white-on-white creates beautiful but subtle texture in the background, a perfect foil for the brightly blended sentiment die cuts. I adhered the blended die cut letters to the textured card front using foam adhesive for lots of height.

To create some extra texture interest and add some sparkle to my card front, I added some more glittery die cut sprigs from the Love and Florals Fancy Dies cut from white Glitter Basics cardstock. I tucked them behind the die cut letters and adhered them with liquid glue. I added a tiny sentiment strip over the top of the LOVE. Simple, but so romantic and so effective! It would work for a wedding, anniversary, Valentine's Day, or just any time you're feeling mushy towards your partner.
Well, that's all for my projects today! The new dies from the January 2023 release are so well done, so if you haven't taken a peek yet, I encourage you to do so! Thanks so much for stopping by today, and have a marvelous day!

|


Leave a comment
Please login with your Hero Arts account in order to comment.
Click HERE to sign up if you don't have an account.