-
Products
-
Categories
Menu
-
Products
-
Categories
Celebrate with a Fiesta!
Emily Midgett
Hi there! Emily Midgett here with you today, and I have a super festive "fiesta" birthday project for you using the new Birthday Border Fancy Die! These fancy border dies are some of my favorites with which to create; you can go super simple and just use them as silhouettes for a great background, or you can go super detailed (as I've done today) with your markers or watercolors to make a fun, colorful scene! Let's get started with the details.

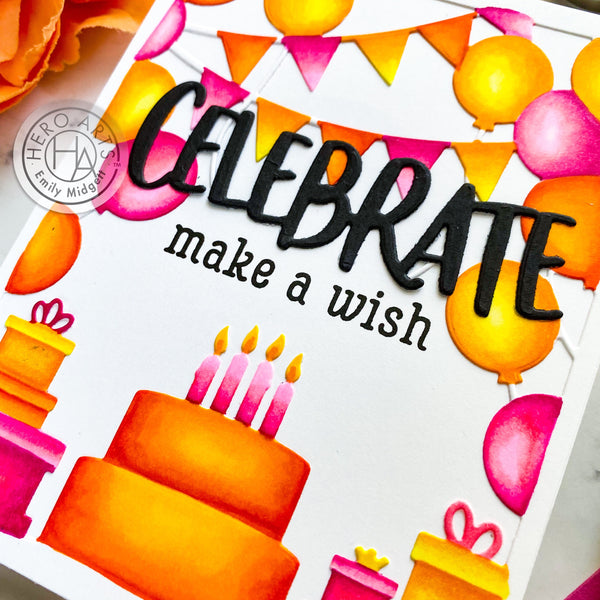
I started by die cutting the Birthday Border Fancy Die from some white Copic-friendly cardstock. I then used my Copic markers in the shades listed below to add lots of fun, festive color to the individual elements to create a fiesta party scene!

Once I'd finished adding the color to the entirety of the background, I adhered it to an A2 panel of white cardstock. I thought about doing some ink blending on the card base, but I loved the stark contrast of the vivid colors so much that I just kept the background plain to allow the colors to really stand out.

I die cut a black "celebrate" from Birthday Stamp & Cut XL using Pitch Black cardstock and also added a stamped "make a wish" from the coordinating stamp set, stamped in black ink on the card base itself.

I adhered the "celebrate" with Precision Glue (would also be cute as a dimensional die cut or with foam tape to pop it up!), making this a super flat, easily mailed birthday card.
Well, that's all for my project today! I had such fun coloring this Birthday Border Fancy Die... I hope you'll try coloring your fancy silhouette dies. Thanks so much for stopping by today, and have a marvelous day!

|


Awesome card Emily, love the bright colours you used!
Thank you so much for sharing, stay safe and have a wonderful day.