

Posted by Spellbinders Team
on June 13, 2024

Hello there, Michelle Short here and I am delighted to be back on the Spellbinders blog using the Sealed 3D Botanical collection. This beautiful collection features 3D cut & emboss folders, labels and tags dies, plus wax seal stamps. My projects today focus on embossing folder techniques.
 For my first card, I wanted to show simple ink blending with embossing folders. This can be done before embossing or afterwards and they both give slightly different looks. For this card, I added the ink blending first.
This meant that I could not take advantage of the cut & emboss feature of these folders, but it still worked well.
For my first card, I wanted to show simple ink blending with embossing folders. This can be done before embossing or afterwards and they both give slightly different looks. For this card, I added the ink blending first.
This meant that I could not take advantage of the cut & emboss feature of these folders, but it still worked well.
 To make this card:

 I wanted to create a matching envelope for my card, so I used the Forest Mushrooms Wax Seal Stamp to seal the envelope.
 I did not get a perfect impression with the wax seal stamp. I am new to wax sealing and need a bit more practice, but it still looks pretty!
For the purposes of the photos, I adhered it to the envelope using low-tack tape, but when I am ready to seal the envelope with the card inside, I will adhere it using a Sealed Wax Seal Adhesive Circle, cutting the size to fit the oval shape.
I did not get a perfect impression with the wax seal stamp. I am new to wax sealing and need a bit more practice, but it still looks pretty!
For the purposes of the photos, I adhered it to the envelope using low-tack tape, but when I am ready to seal the envelope with the card inside, I will adhere it using a Sealed Wax Seal Adhesive Circle, cutting the size to fit the oval shape.
 My next card uses ink blending as well, but this time with the added step of highlighting the raised areas with white ink.
To make this card:
My next card uses ink blending as well, but this time with the added step of highlighting the raised areas with white ink.
To make this card:


 I wanted to create a matching envelope for this card too, so I used the Peony Butterfly Wax Seal Stamp to seal the envelope.
 The white pen helps to highlight the image on the wax seal, just like the white pigment ink does for the embossing. Not keen on white? There are lots of metallic markers that can be used too!
 For my last project, I wanted to share the great technique of using the reverse of the embossing folder and adding black ink.
To make the tag:
For my last project, I wanted to share the great technique of using the reverse of the embossing folder and adding black ink.
To make the tag:


TECHNIQUE 1 – INK BLENDING
 For my first card, I wanted to show simple ink blending with embossing folders. This can be done before embossing or afterwards and they both give slightly different looks. For this card, I added the ink blending first.
This meant that I could not take advantage of the cut & emboss feature of these folders, but it still worked well.
For my first card, I wanted to show simple ink blending with embossing folders. This can be done before embossing or afterwards and they both give slightly different looks. For this card, I added the ink blending first.
This meant that I could not take advantage of the cut & emboss feature of these folders, but it still worked well.
 To make this card:
- Die cut middle-sized die from Mushrooms From Me to You 3D Emboss & Cut Folder using white cardstock.
- Using Blending Brushes, blend red inks on top. Start at the bottom with dark red, add a slightly lighter shade in the middle, and finish with a lighter shade at the top.
- Place inside Mushrooms From Me to You 3D Emboss & Cut Folder and run through Platinum Six Machine.

- Adhere panel to an A2-sized white card base with foam tape.
- Stamp the ‘just a note’ sentiment from Typewriter Adventure Sentiments onto Onyx Cardstock using Clear Embossing & Watermark Ink.
- Apply White Embossing Powder and heat set using heat tool. Cut into a strip.
- Adhere to card using foam tape.
- To finish off, add white gel pen dots for added interest.
 I wanted to create a matching envelope for my card, so I used the Forest Mushrooms Wax Seal Stamp to seal the envelope.
- Set up for wax sealing using the Wax Seal Starter Kit.
- Place 4 Coral, 1 Pink Damask and ½ Fuchsia Wax Beads in spoon to melt.
- Once melted, pour onto silicone mat.
- Place Forest Mushrooms Wax Seal Stamp on top and leave in place for a couple minutes.
- Remove stamp from wax and peel seal from silicone mat.
 I did not get a perfect impression with the wax seal stamp. I am new to wax sealing and need a bit more practice, but it still looks pretty!
For the purposes of the photos, I adhered it to the envelope using low-tack tape, but when I am ready to seal the envelope with the card inside, I will adhere it using a Sealed Wax Seal Adhesive Circle, cutting the size to fit the oval shape.
I did not get a perfect impression with the wax seal stamp. I am new to wax sealing and need a bit more practice, but it still looks pretty!
For the purposes of the photos, I adhered it to the envelope using low-tack tape, but when I am ready to seal the envelope with the card inside, I will adhere it using a Sealed Wax Seal Adhesive Circle, cutting the size to fit the oval shape.
TECHNIQUE 2 – HIGHLIGHT WITH WHITE INK
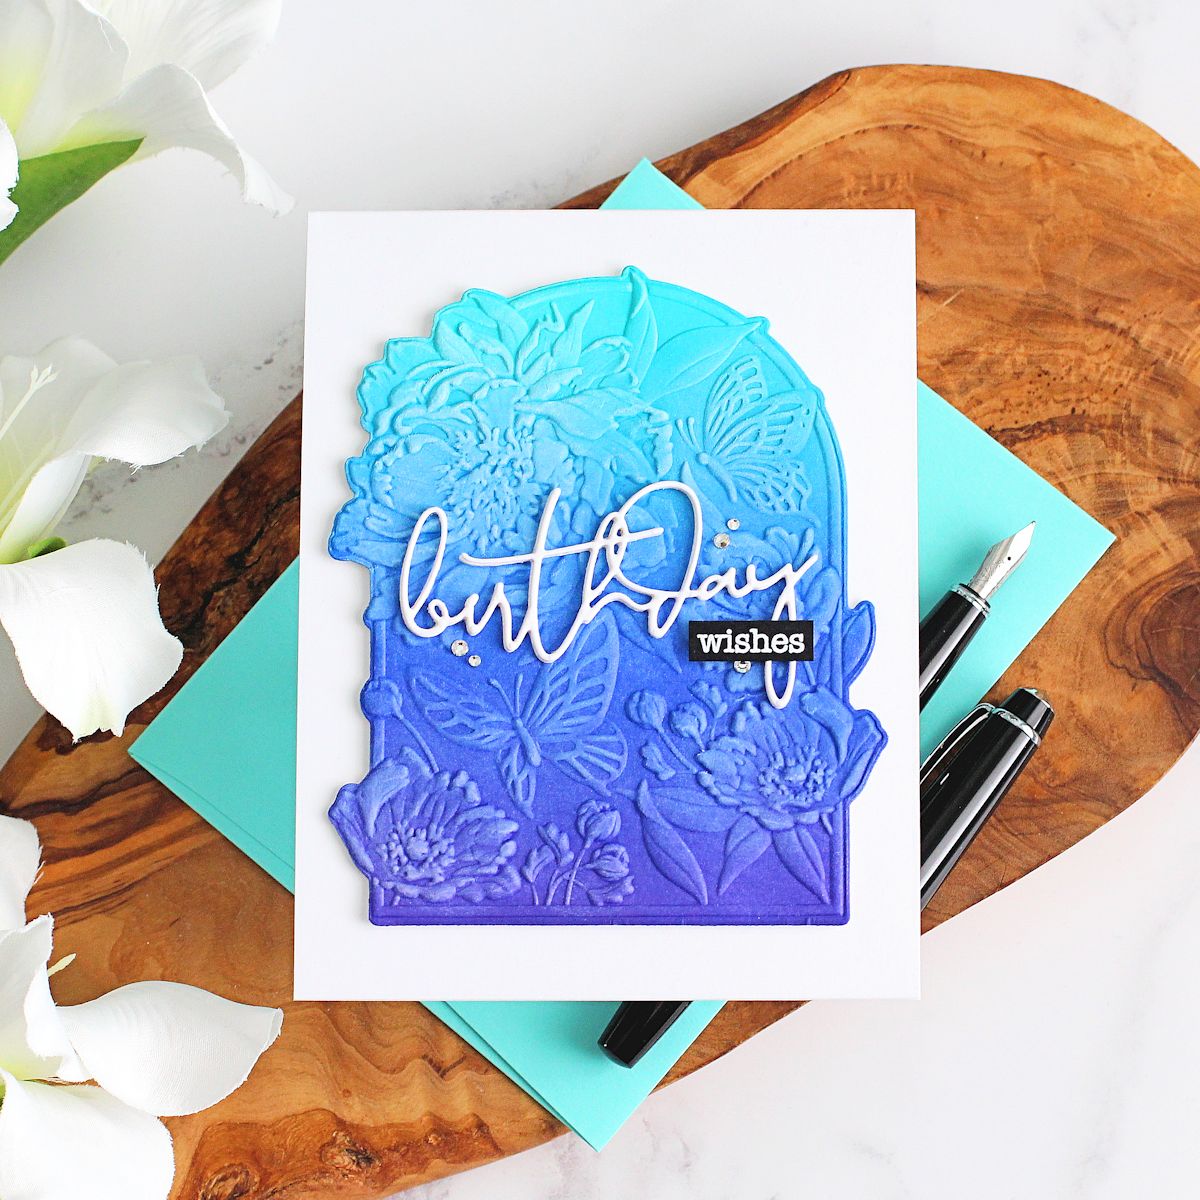 My next card uses ink blending as well, but this time with the added step of highlighting the raised areas with white ink.
To make this card:
My next card uses ink blending as well, but this time with the added step of highlighting the raised areas with white ink.
To make this card:
- Place the largest size of die inside the Floral For You 3D Emboss & Cut Folder.
- Place white cardstock inside and run through Platinum Six Machine.
- Remove cut and embossed panel and add ink blending on top using Blending Brushes.
- Add blue-purple ink to the bottom, blue in the middle, and turquoise at the top.

- Using a flat foam applicator tool, blend white pigment ink onto the raised areas.
- Heat set white ink using a heat tool.
- Adhere panel to an A2-sized white card base with foam tape.
- Die cut birthday word from Yana’s Layered Script Sentiments three times and adhere one on top of another using Bearly Art Glue.

- Stamp ‘wishes’ from Typewriter Adventure Sentiments onto Onyx Cardstock using Clear Embossing & Watermark Ink. Apply White Embossing Powder and heat set.
- Cut into a strip and adhere to card using foam tape.
- To finish, embellish with Silver Mix Color Essentials Gems.
 I wanted to create a matching envelope for this card too, so I used the Peony Butterfly Wax Seal Stamp to seal the envelope.
- Set up for wax sealing using the Wax Seal Starter Kit.
- Place 2 Teal, 3 Royal Blue and ½ Pearl White Wax Beads in spoon to melt.
- Once melted, pour onto silicone mat.
- Place Peony Butterfly Wax Seal Stamp on top and leave in place for a couple minutes.
- Remove the stamp from wax and peel seal from silicone mat.
- Draw over the raised areas using a white acrylic paint pen.
 The white pen helps to highlight the image on the wax seal, just like the white pigment ink does for the embossing. Not keen on white? There are lots of metallic markers that can be used too!
TECHNIQUE 3 – ADD BLACK INK
 For my last project, I wanted to share the great technique of using the reverse of the embossing folder and adding black ink.
To make the tag:
For my last project, I wanted to share the great technique of using the reverse of the embossing folder and adding black ink.
To make the tag:
- Die cut tag die from Fresh Picked Labels & Tags Etched Dies using white cardstock.
- Place inside Floral For You 3D Emboss & Cut Folder with the front of the tag facing backwards, making sure to check where the reverse of the image will deboss, not the front.
- Run through Platinum Six Machine.
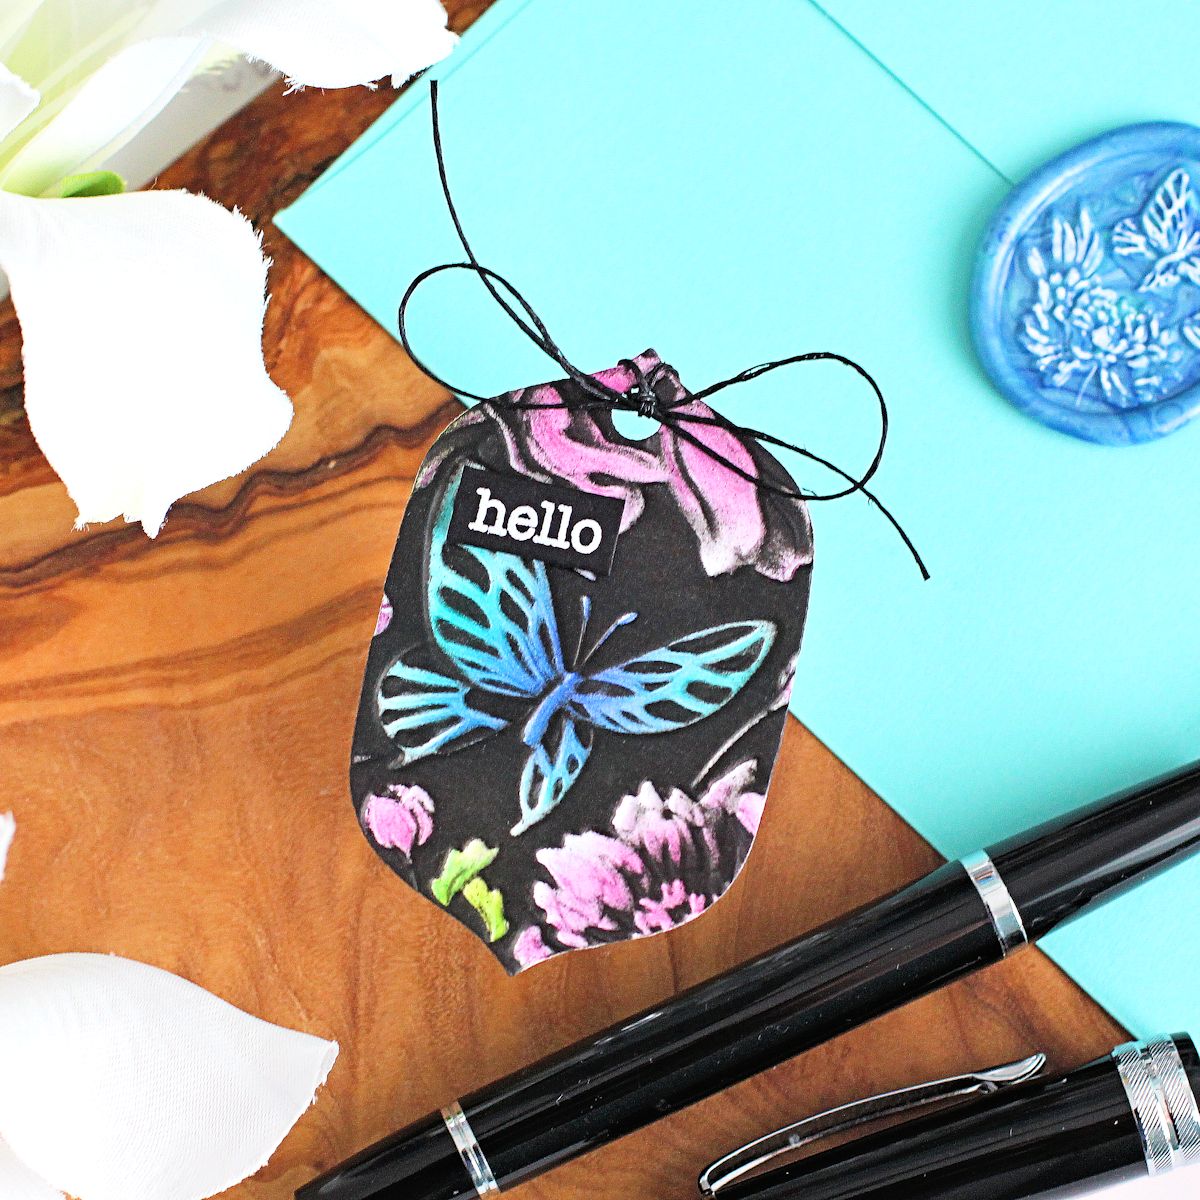
- Using Mini Blending Brushes, blend ink inside the debossed areas.
- Take black pigment ink and using a direct-to-paper method, swipe the ink pad on top of the tag to cover the raised areas.

- Heat set ink using heat tool.
- At this point, you can add extra color to the debossed areas using pencils but is not necessary.
- Die cut another tag from white cardstock and adhere to back (to cover the embossing on the back of the tag).
- Thread twine through the top of the tag and tie in a bow.
- Stamp and heat emboss sentiment from Typewriter Adventure Sentiments onto Onyx Cardstock.
- Cut into a strip and adhere to the tag using foam tape.
Spellbinders Supplies:























































































