Video: So Many Ways to Use Hero Paste!
Hey everybody! It's Maria here and I hope you're all having an amazing day today! I'm excited because for today's blog post I got to play around with Hero Paste and I've even got a video for you.
Hero Paste is a white, opaque texture paste that you can use in a variety of different ways to add texture to your projects. You can use it to create a range of different textures from smooth, to wavy, to spackled and more (possibilities are endless when you start applying it with different tools). You can also add glitter or embossing powder to the top when it's wet to add sparkle or even more texture. Depending on the look you are going for you can heat your Hero Paste to make it bubble up, keep it simple and apply it through a stencil, or, you can even dye your paste to change the color! Check out the video I've made showing you how to easily implement all of these techniques so that you can get the most out of your Hero Paste.
If you are having trouble watching this video click here to watch it on YouTube.
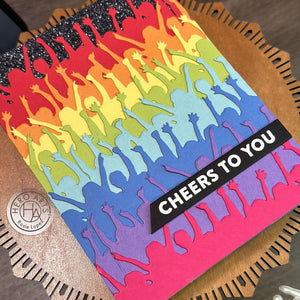
Here's a card showcasing one of the backgrounds that I made in my video. I used my Reactive Ink Reinkers in Lemon Drop, Creamsicle and Fruit Punch to dye my paste before applying it through the Fall Leaves Stencil.

After removing the stencil I sprinkled a little bit of Sand Embossing Powder onto the wet paste and then heated it to melt it (I was careful not to overheat it and bubble my paste). Then I finished my card off by adding the background to a Sand card base and topping it off with a sentiment from the Autumn Messages stamp set.

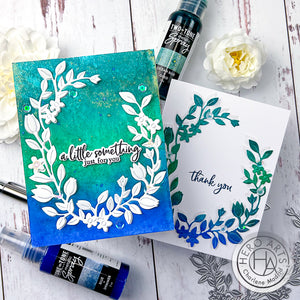
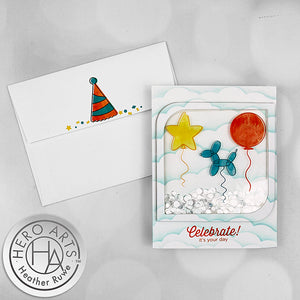
This next card features another background from the video. I used my DIY Liquid Watercolor sprays, Hero Paste and the Mermaid Sea Waves Stencil to create the background before adding it to a white card base. Then, I created a frame using the Nesting Rectangle Infinity Dies.

I cut a white shell from the Seashells Fancy Dies and a small, gold seahorse from the Paper Layering Seahorses. I added those to my card with foam tape and then added a sentiment from the Sea You Soon stamp set.

This next card uses a piece I created using the Mermaid Sea Waves Stencil, Hero Paste and Brass Embossing Powder as a focal point. I stamped a Sand card base with Embossing & Watermark Ink using the Ocean Waves Bold Prints stamp. Then I used foam tape to adhere my textured focal point.

I added a sentiment from the Sea You Soon stamp set after heat embossing it onto Sand Cardstock using Onyx Pigment Ink and Clear Embossing Powder. The final touch was to add a sea star from the Seashells Fancy Dies that I had sprayed with gloss sprays. It was hard to capture in the pictures but in real life the brass waves are very shiny and eye catching.

The last thing I want to mention today is clean up. To make clean up easier I worked on top of a large piece of paper so that all I had to do was throw my messy paper away. This meant I didn't have to clean up my work surface. I recommend cleaning the paste off of your tools and stencils as soon as possible after using them. Having a baby wipe or a tub of water nearby may be helpful. If the paste dries on your tools or stencil before you can get around to cleaning them don't worry! Soak your tools and stencils in a sink full of hot water until it starts to soften. You will be able to remove the paste this way especially if you use a sponge to scrub. I do want to caution you that if you allow the paste to dry on your more delicate stencils that you can't scrub without damaging them (like the Mermaid Sea Waves stencil I used) you will need to take the time to carefully remove the paste by hand (ask me how I know). It will come off but just be aware that it will take much longer than if you clean it right away while the paste is still wet.
Ok, you guys, that's all I've got for today! I hope my video and projects will inspire you to have a little fun with Hero Paste. If you have any questions just let me know!
Have an awesome day and I hope you all have a little time to be creative today!

|


Leave a comment
Please login with your Hero Arts account in order to comment.
Click HERE to sign up if you don't have an account.
3 Responses
Elaine H.
September 14, 2021
Great demo. Mixing the colors in the past is brilliant and the cards are very cool. I really loved the last card…very elegant. Thank you.
Patricia Wilson
September 13, 2021
This was very interesting and takes the guesswork out of using the texture paste for us. I hate experimenting as I waste so much and don’t come out with what I want. Thanks for showing us these techniques.
Melissa SunshineHoneyBee
September 13, 2021
Like how you used different inks to color paste. I have the inks & waiting on Leaf stencil to arrive so have to ck out my paste supply.
Melissa
“Sunshine HoneyBee”