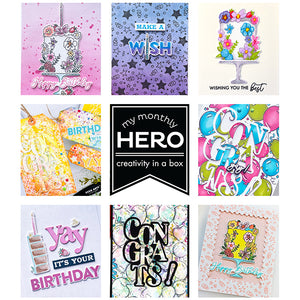
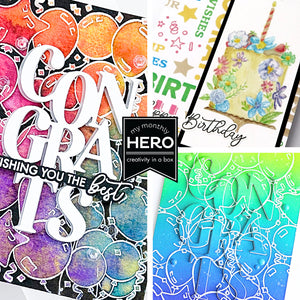
Join Us for a My Monthly Hero Make-Along!

Our next LIVE Make-Along event is this weekend! Join Channin to make along with the April 2024 My Monthly Hero Kit. Gather your supplies and create cards with Channin from start to finish.
👉🏼 When: Sunday, May 5 at 12:00pm PT/3:00pm ET
👉🏼 Where: Hero Arts Facebook and YouTube
In addition to the sold out April My Monthly Hero Kit, the following supplies will be used:
Supplies:
April 2024 My Monthly Hero Kit, Premium
Dove White Hero Hues Premium Cardstock
Sand Hero Hues Premium Cardstock
Stamp Positioning Tool ex. MISTI
Die-Cutting Machine
Foam Adhesive
Paper Trimmer
Copic Markers: Purple: BV31, BV00, BV02; Yellow: Y15, YR23; Pink: RV13, RV25; Green: YG03, YG63; Tan: E30, E43; Brown: E77
Instructions:
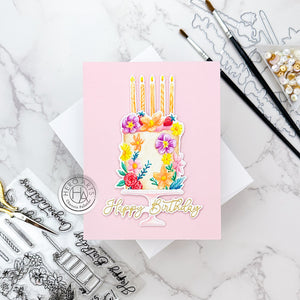
Card 1: Birds & Flowers Card
- Stamp images from the Birds & Flowers Stamp Set (Premium Kit) onto Dove White cardstock in Espresso ink.
- Color the stamped images with copic markers then die cut out with coordinating dies.
- Trim Sand cardstock to create a 4 1/4” x 5 1/2” panel.
- Stamp the panel with several images from the Birds & Flowers Stamp Set in Sand ink to cover the entire panel.
- Use E43 marker to add small dots to fill in the negative spaces between the images.
- Die cut the panel with one of the Arches Infinity Dies.
- Make an A2 top-folding card base from Sand cardstock by trimming the cardstock down to 11” x 4 1/4” then scoring at 5 1/2”.
- Adhere the die cut arch to the card front with liquid glue using the remaining panel as a jig to get the arch in the right place on the card front. Then adhere the panel to the card front with foam adhesive.
- Stamp a sentiment from the Birds & Flowers Stamp Set onto the card front in Espresso.
- Adhere the copic colored images to the card front with foam adhesive.
- Die cut all the butterflies and two sets of leaves using the coordinating frames cuts (Classic & Premium) out of Dove White cardstock.
- Ink-blend over the die cuts with several core inks (combos below), using the Color Layering Floral Butterfly Stencils (Classic & Premium) to create the details. Note: Flip one of the leaf die cuts over to create a mirrored image of the leaves. Color Combos - Pink Butterflies: Cotton Candy + Azalea; Purple Butterflies: Passion Flower + Cornflower; Yellow Butterflies: Dandelion + Spicy Mustard; Leaves: Kiwi + Forever Green
- After ink-blending the die cuts add details with a copic marker (E77).
- Make an A2 top-folding card base from Sand cardstock by trimming the cardstock down to 11” x 4 1/4” then scoring at 5 1/2”.
- Adhere the butterflies and leaves to the card front with foam adhesive.
- Stamp a sentiment from the message stamp set (Classic & Premium) onto Sand cardstock in Espresso ink. Fussy cut sentiment out.
- Adhere sentiment to the card front with foam adhesive.
If you cannot join us for the live event, no problem! The video will be available to watch on replay on YouTube or Facebook whenever it is convenient for you.
We hope to see you there!


Leave a comment
Please login with your Hero Arts account in order to comment.
Click HERE to sign up if you don't have an account.
1 Responses
Marilee DeMars
May 03, 2024
That looks like as lot of fun!