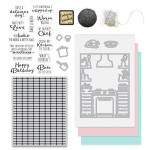
Video: Adding Color to Die Cuts Featuring the May 2022 My Monthly Hero Kit
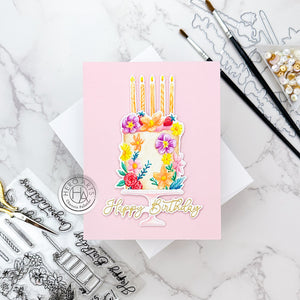
Hi everyone! Ilina here. Today I have a card for you using the fun new May My Monthly Hero Kit. For this card we will take plain white die cut and customize it by coloring it with your favorite coloring medium. I am using alcohol based markers (Copics) and colored pencils, but you can use any coloring medium of your choice. If you decide to use watercolors I would recommend using watercolor paper to die cut the top panel.

Start by die cutting the cover die three times from Deluxe Smooth White cardstock. Cut off the fruit bowl.
Using silver gel pen, color the drawer handles (they come out as separate die cuts). Set aside to dry. In the meantime, use the same gels pen to add silver details to the stove. I used Post-it tape for masking and to make sure I kept the "coloring" in straight line, but you can use anything you have handy. Let it dry before continuing coloring, or use your heat tool to speed up the drying process. The silver gel pen will smear if not dry.
Add color to the shelves, toaster, kitchen and everything else on the shelves using your coloring medium of choice. (I used Copic markers, colored pencils, and silver gel pen for details.)
Watch the video below to see how this card came to be or click HERE to watch on YouTube.

Once you have colored the entire kitchen and you are pleased with it, set it aside.
Stamp the background stamp using Clear Embossing and Watermark ink on 4 1/4" x 5 1/2" panel cut from Mist cardstock. Emboss with White Satin Pearl embossing powder. Ink blend starting from the top using Pool and Soft Pool Shadow inks, darker on top, going lighter in the middle. Remove the excess ink from the embossing areas using soft cloth. Set aside.
Adhere all three cover plate die cuts together, with the colored one on top. This will add more sturdiness and dimension. Adhere it to the background panel we just ink blended.
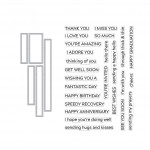
Stamp sentiment onto Pitch Black cardstock and emboss using White Detail embossing powder. Die cut using one of the strip dies from the Message Strips XL Stamp &Cut set. Die cut two extra strips for stacking, or you can use foam tape or squares. Adhere them together and add the message to the kitchen panel.
To finish the card, adhere the entire panel to a Top Folded Dove White Card.

Thank you so much for stopping by and hope you have an amazing day!

|


Leave a comment
Please login with your Hero Arts account in order to comment.
Click HERE to sign up if you don't have an account.
2 Responses
Cynthia O.
May 08, 2022
Thank you for the video, Ilina. Great tips and fabulous kitchen scene!
Bj Clark
May 03, 2022
All of this card so cute thank you Ileana For sharing and have a great day