Video: 3D Decoupage with Layering Iris | Color Layering With Yana Series
Hello, Hero Arts fans! Welcome back for another episode of the Color Layering video series!

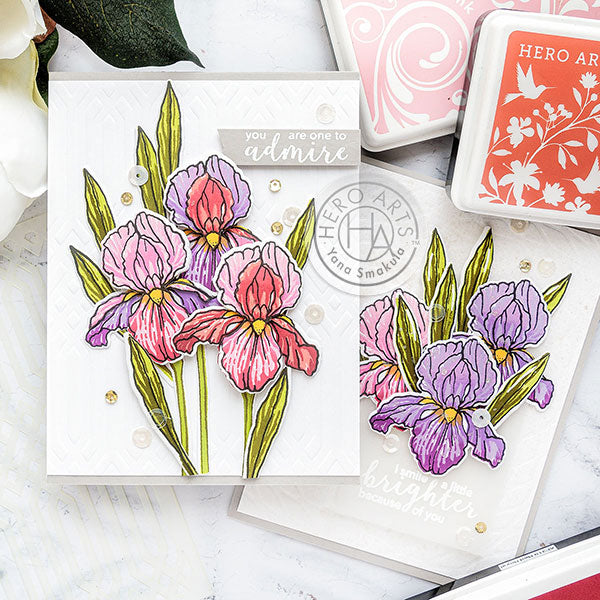
In this video and episode, we are taking a closer look at the Color Layering Iris stamp set.
Watch the video tutorial below to learn how I made the cards I'm sharing today.
If you’re having a problem viewing this video, please try watching it HERE in HD on YouTube.
The Iris stamp set features a large beautiful iris flower a leaf, and a stem. The flower and leaf have three layers each - an outline, a solid layer, and a detail. The stem has solid and outline layers.
These types of images are easiest to align when you stamp the outline first. I used a MISTI stamping tool to do my stamping because I’ll need several irises for the 3D decoupage technique.
I used the following ink colors for the stamping:
- Black for the outline;
- Fresh Peach and Ombré Light to Red Royal;
- Soft Pink and Ombré Pink to Red;
- Passion Flower and Ombré Hydrangea;
- Lime Green and Forever Green.
Having stamped the flowers, leaves and also stems I cut them out with the help of coordinating dies. To create the 3D decoupage look you need to layer parts of the image over the original image with the help of foam adhesive. Looking at the iris, I see several ways I can cut it up and layer to have that beautiful dimensional effect.
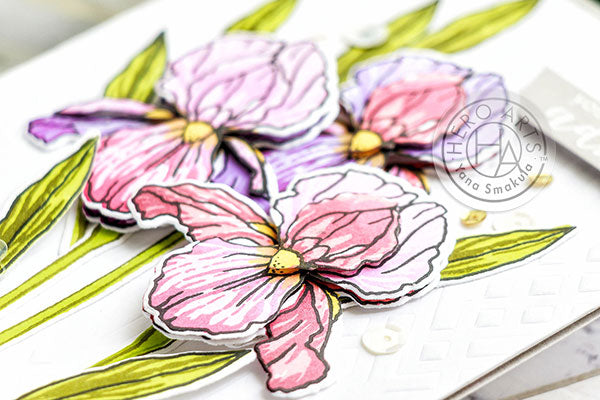
Cutting it apart and layering also gives me a unique opportunity to create multi-colored irises, something that does exist in nature, but impossible to do, or rather very hard to do, when stamping. The two things you'll need when doing the 3D Decoupage are a good pair of scissors to cut the image parts out and the foam adhesive, of course. You can go with just two layers, or you can go with three or even four layers if your image allows it. Doing three layers hit the sweet spot for the irises and so I made each with about three layers. I love how this allowed me to add more color and add more interest to my flowers without too much effort.
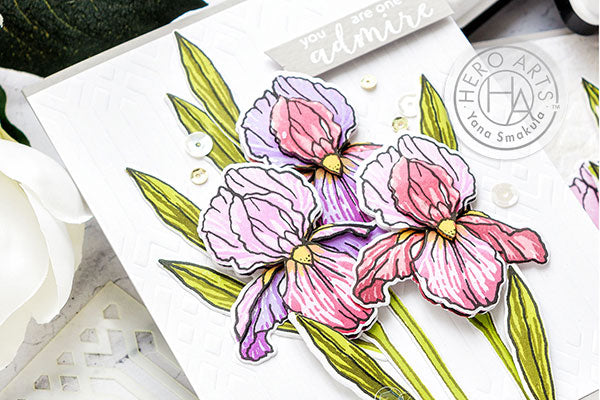
In regards to foam adhesive - it is best to use thin foam adhesive for projects like this unless you don’t plan to have too many layers, as adding a lot of layers using regular foam adhesive will result in a bulky die cut.
Cards with 3D decoupage are best hand-delivered or mailed in a box to preserve the 3D effect for the recipient.
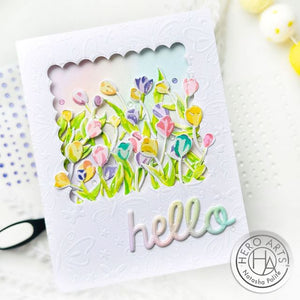
To create a card and card front I dry embossed a sheet of Dove White cardstock with the help of the Graphic Deco stencil. I cut panel to 4 1/4 x 5 1/4” and adhered it to an A2 card base made from Pebble cardstock. Using glue I adhered flowers and leaves in place in the center of the background and used foam adhesive squares in a few spots to pop some of the elements on the card. I made sure not to add any more dimension overtop the existing 3D decoupage items.
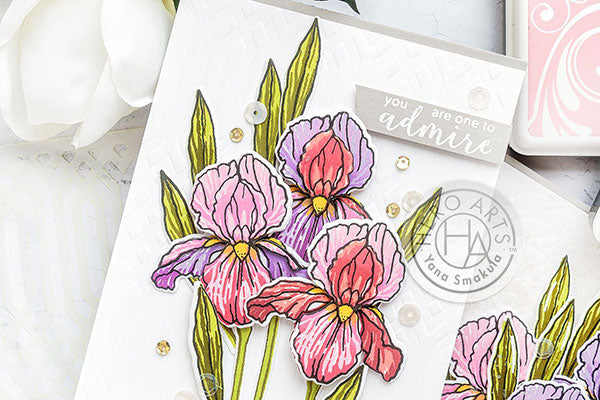
The sentiment was heat embossed in white embossing powder on the same Pebble cardstock, cut to a skinny strip and foam mounted on the card. Lastly, I used Champagne sequins to dress this card up.
Do you like this look? Have you ever done it on your cards? Let me know in the comments below. Have fun stamping!


Leave a comment
Please login with your Hero Arts account in order to comment.
Click HERE to sign up if you don't have an account.
18 Responses
Judy Inukai
July 14, 2019
Awesome. I love Irises.Thanks for the fabulous tutorial.
Brenda
July 12, 2019
Beautiful cards Yana and what a great idea! Thank you so much for sharing!
Nancy
July 10, 2019
Are you referring to sheet foam adhesive or the adhesive dots or squares?
Phyllis Freese
July 10, 2019
very pretty
Virginia
July 10, 2019
Beautiful Yana! Now I want those stamps!
Julie
July 10, 2019
I love the decoupage look! beautiful iris flowers.
Henriétte
July 10, 2019
Gorgeous Yana, I love how you can use in this way more colours to one flower. Thank you so much for showing.
Joan
July 10, 2019
I like be your flower cards. This one looks especially realistic. I usually add wink of Stella on top of my flowers to give them a sparkle!
Alexa Jacqui Ocon
July 09, 2019
Simply brilliant & extraordinary work! 😉
Jan Meredith
July 08, 2019
So beautiful
barbara lassiter
July 08, 2019
I like both looks and Yana has great ideas!
Cyndi Morris
July 08, 2019
I love this technique. I have done the 3-D technique in the past with a poinsettia stamp and it worked well. I don’t know why I haven’t tried it again, but I definitely will after seeing your video. This is such a beautiful stamp set — the iris is my favorite flower.
Jan Castle
July 08, 2019
TFS Yana….beautifully done!!! Going on my wish list!!!
Paper Hugs,
Jan
Cindy C.
July 08, 2019
I love seeing this project!! So beautiful, it’s something I’ve been thinking of doing, your card inspires me to actually do it!! :) Thanks for the inspiration!!
Karen F.
July 08, 2019
Yana this card is so beautiful! The iris is perfect for this technique. Thank you for sharing!
Barbara-Jean
July 08, 2019
beautiful as always, Yana…
Karthikha Uday
July 08, 2019
That’s so beautiful! I love the layering and dimension, it adds a great touch! <3
Betty
July 08, 2019
love the 3D look and the beautiful colors on your iris, Yana – going to have to give this a try!