Awesome Add-ons: August 2019 Edition

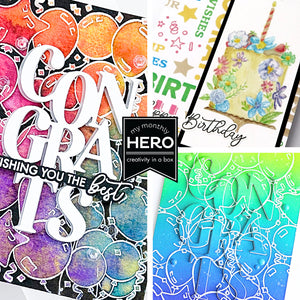
Hi stampers, it’s time for this month’s Awesome Add-ons feature! Before we dive into the project inspiration, here’s a look at all 18 of the add-on products that were introduced along with the August kit. This collection is a fantastical assortment of fairytale products fit for royalty!

Shop for the August MMH add-ons here
Today we're delighted to have Debi Adams here to share some fabulous “beyond the kit” ideas for a few of the add-ons. Let's get started!
Hey there friends! Happy August! I’m Debi Adams and I’m thrilled to be back on the Hero Arts blog sharing two projects featuring a few add-ons from the August 2019 My Monthly release. I love the diversity from each of the stamps/stencil/dies in this collection. I truly believe there is something for everyone! Today I am showcasing some Medieval images that have lots of possibilities. Though I created these in reds, grays and black, I do believe they can be created in pinks and lavenders for a softer approach. 
I created this card using the Banner die however, it is perfect standing alone as well. Think birthday banner. There are lots of sizes and shapes, many of which layer together and add great dimension. 
Instructions
1. Stamp Cobblestone Bold Prints onto a piece of Dove White cardstock using Soft Granite ink and MISTI. Trim image to 4 1/2” x 6”. Color various sections of image with several shades of gray markers. Adhere piece to front of 4 1/2” x 6” top folding card base.
2. Die-cut large flag from gray cardstock.
3. Die-cut smaller flag from Dove White cardstock.
4. Die-cut poles from gold poster board.
5. Assemble #2-#4 using foam dots. Adhere to card base.
6. Stamp and die-cut unicorn from Dove White cardstock using Intense Black ink. Shade with light gray marker.
7. Use Nesting Circle Infinity Dies to cut out two circles, one from patterned paper and one larger, cut from gold poster board. Adhere patterned circle to gold poster board circle.
8. Die-cut pennant from Dove White cardstock and gold poster board. Die-cut pole from gold cardstock.
9. Stamp sentiment onto pennant using Intense Black ink. Embellish pennant with light gray marker. Attach pennant to gold poster board base and then attach pole.
10. Attach pennant then unicorn onto larger flag using adhesive and foam dots.
Supplies
Hero Arts: CG792 Cobblestone Bold Prints, CM388 Majestic Beasts, DI686 Majestic Beasts Frame Cuts, DI681 Medieval Flags Infinity Dies, DI199 Nesting Circle Infinity Dies, PS325 Hero Hues Dove White Cardstock, AF226 Soft Granite Ink, AF345 Intense Black Ink, MT100 Original MISTI Laser Etched Tool, CL033 Acrylic Block
Other: Foam dots, patterned paper of your choice, light gray markers, gold poster board, 4 1/2” x 6” white card base
It’s always fun to add a little twist to card making. Here is one that features the half flip design. 
Instructions
1. Mark the middle front of a 4 1/2” x 6” side-folded card with a pencil at 2 1/4”. Score a line from that pencil mark vertically, but leave no score line where an estimated rectangle will be cut. (This area is approximately 1 1/2” down from the top continuing another 2 1/4”, after which the scoreline picks up again.)
2. To cut only half of the front of the card as shown, place the Rectangle Infinity Die (approximate size is 3 1/4” x 2 1/4”) on top of the front of the card, where it should be centered with the original score line. (Mark the half way point of your die if necessary.) Use repositionable tape to secure. IMPORTANT step: Lay one cutting plate on bottom of platform. Place the top cutting plate ONLY on the half portion of the die that needs to be cut. For this card, it is on the right hand side and up to the score line only.
3. Once cut, fold back where score lines were drawn.
4. Die-cut a piece of Pitch Black cardstock using the same size Rectangle Infinity Die. Place black cardstock on front left of card making sure only half of the black shows through the rectangle frame. Trim to fit, then adhere.
5. Cut a rectangle that is slightly larger than one on front of card from gold poster board. Adhere to inside of card, behind white cardstock.
6. Stamp sentiment onto Dove White cardstock using Intense Black ink.
7. Stamp and die-cut crown and lion from Dove White cardstock using Intense Black ink. Adhere crown above sentiment using a foam dot.
8. Die-cut lion outline from gold poster board. Attach lion image to gold poster board and adhere to black area.
9. Stamp Trefoil Bold Prints onto a piece of Pitch Black cardstock using Unicorn White ink and the MISTI.
10. Trim print to 2 1/2” wide by 6” long. Adhere to inside of a 4 1/2” x 6” card.
11. To create stripes on front, cut two small strips of gold poster board and adhere to inside of folded back card. 

Supplies
Hero Arts: CG783 Trefoil Bold Prints, CM388 Majestic Beasts, DI686 Majestic Beasts Frame Cuts, DI198 Nesting Rectangle Infinity Dies, PS325 Dove White Cardstock, PS323 Pitch Black Cardstock, AF345 Intense Black Ink, AF249 Unicorn White Ink, CL074 Acrylic Block, MT100 Original MISTI Laser Etched Tool
Other: Foam dots, 4 1/2” x 6” white ward, gold poster board, light gray marker, patterned paper of your choice, repositionable tape
Thanks for joining me today. Hope to see some of your projects created with these magical images!
XO,
Debi
A reminder for all My Monthly Hero subscribers: You have the opportunity to add extra items, including but not limited to add-ons, to your kit shipments with no additional shipping charges. Simply log in to your Hero Arts store account and place your order by 11:59am PST on Thursday, August 8 to take advantage of this offer.
Happy stamping!


Leave a comment
Please login with your Hero Arts account in order to comment.
Click HERE to sign up if you don't have an account.
6 Responses
Michele W
August 09, 2019
Love these cards and this entire kit with add-ons. Can hardly wait for mine to arrive so I can start playing. :) Thanks for sharing!
Anne-Laure Barabé
August 08, 2019
I loved Debi’s cards ! As always, when I’m watching the replay on our fanatics group on Facebook, I’m enjoying every card she makes and I want to buy everything ! ;)
Henriétte
August 08, 2019
Awesome add-ons and stunning cards. I love the beautiful Stained Glass stencil.
Thank you so much Debi for your great inspiration.
Debbie Selby
August 08, 2019
This add on post always kills me. I have already ordered my add ons to avoid disappointment, but then I see this post and I wish……………..
Kirsty
August 08, 2019
Cool cards! Love the the colors you used!
Karthikha Uday
August 07, 2019
Wonderful products and inspirations! :)