Video: Layering Holiday Ornaments
Hello there, Michelle here with a card and video showing how you can mix and match different elements from the Holiday Ornaments stamp set, Layering Ornaments Stencil and Layering Ornaments and Trimmings Stencil to create layered ornaments.

All three of these products were designed to work wonderfully together, along with the coordinating Frame Cuts. You can colour as many or as few layers as you want on the ornaments and you can use different mediums and lots of different colours too. I wanted to keep mine monochromatic, but do keep in mind that these products are perfect for customization!
Here is the video showing how I made the card:
If you are having trouble viewing this video, please watch HERE on YouTube.
I started off by stamping three of the Holiday Ornaments from the set on to Dove White cardstock with Contour Ink. I then placed the first layer of the stencil over the top and secured with low-tack tape. Using Ink Blending Brushes, I blended on Dusty Blue Shadow Ink, focusing most of the colour to the right hand side.
I also added a little Navy Mid-Tone Shadow Ink to the right hand side. I removed the stencil and placed the next layer on top. For this layer, I used Navy on its own. The stencil was removed and I placed the topper piece of the stencil on to the image. For this I used Soft Granite Shadow Ink.

I did the same for the other ornaments. I just used two of the layers for mine but you can definitely use all three. You could just use the stencils without the stamping (if going for a no-line look) but it was much easier with the outline there! They were then die cut out using the Holiday Ornaments Frame Cuts.

I took a 4.25" x 5.5" panel of Nautical cardstock and adhered the ornaments on top with foam tape. Before adhering each one down, I threaded silver thread through the hole so that I could have them hanging from the top of the card. The thread was secured in place at the back. The panel was then adhered to an A2 card base cut from more Nautical cardstock.
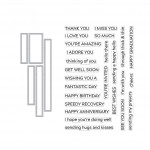
I took the sentiment, from the Make Your Own Snow Globe set, and stamped it on to more Dove White carstock with Intens-ified Black Ink. It was cut in to a strip using a die from the Message Strips Stamp & Cut XL and added to the card. To finish off, I embellished with Neutrals Hero Hues Enamel Dots.
I hope this has given you some inspiration on how you can layer the ornaments. Remember you could use black outlines, heat embossed outlines, different colours of outlines or no-line like I have today. The sky's the limit! Happy stamping!

|


Leave a comment
Please login with your Hero Arts account in order to comment.
Click HERE to sign up if you don't have an account.
3 Responses
Elaine H.
November 17, 2021
Very nice, Michelle! I like simple, too. Great tip on shading. I always forget that part.
Ruth Gauss
November 16, 2021
I love the shading that your ink blending gives and these colors always make me feel at peace (which we can all use more of, I feel!)
Thank you so much for sharing! This is definitely a design I could see making lots of cards with in different colors!
Melissa SunshineHoneyBee
November 15, 2021
Pretty. Have the stamp & stencil. Need the pretty dusty blue ink.
Melissa
“Sunshine HoneyBee”