Holiday Thank You Cards: Adding Copic Details to Die Cuts
Hi there! Emily Midgett here with you today, and I have a pair of holiday-themed thank you notes using some die cutting, adding extra pizzazz with some Copic details and sparkling glitter paper! I adore plain, shaped die cuts, because they're like a blank canvas for you to transform into something super detailed or leave plain for an elegant silhouette. I've got two cards for you today, both in 4-bar size, which is a step outside of my normal cardmaking box, but I love how beautifully the die cuts fit on this smaller canvas! Let's get started with the details.

Both of my cards feature vivid red Copic details on a crisp white background. There's nothing that screams holiday quite as well as cardinal red and white, so I stuck with a simple color scheme and let the die cut images do the talking for me!

My first project features a cluster of ornaments die cut using the Holiday Ornaments Frame Cuts. I die cut all of the sizes from both Glitter Paper Basics for the white glitter ornaments and Cherry cardstock for the red. I added some shading details on the red ornaments using Copic markers. Such a simple and quick way to add some extra depth to your plain die cuts! I love the little debossed areas too; they add such lovely texture to your plain die cuts.
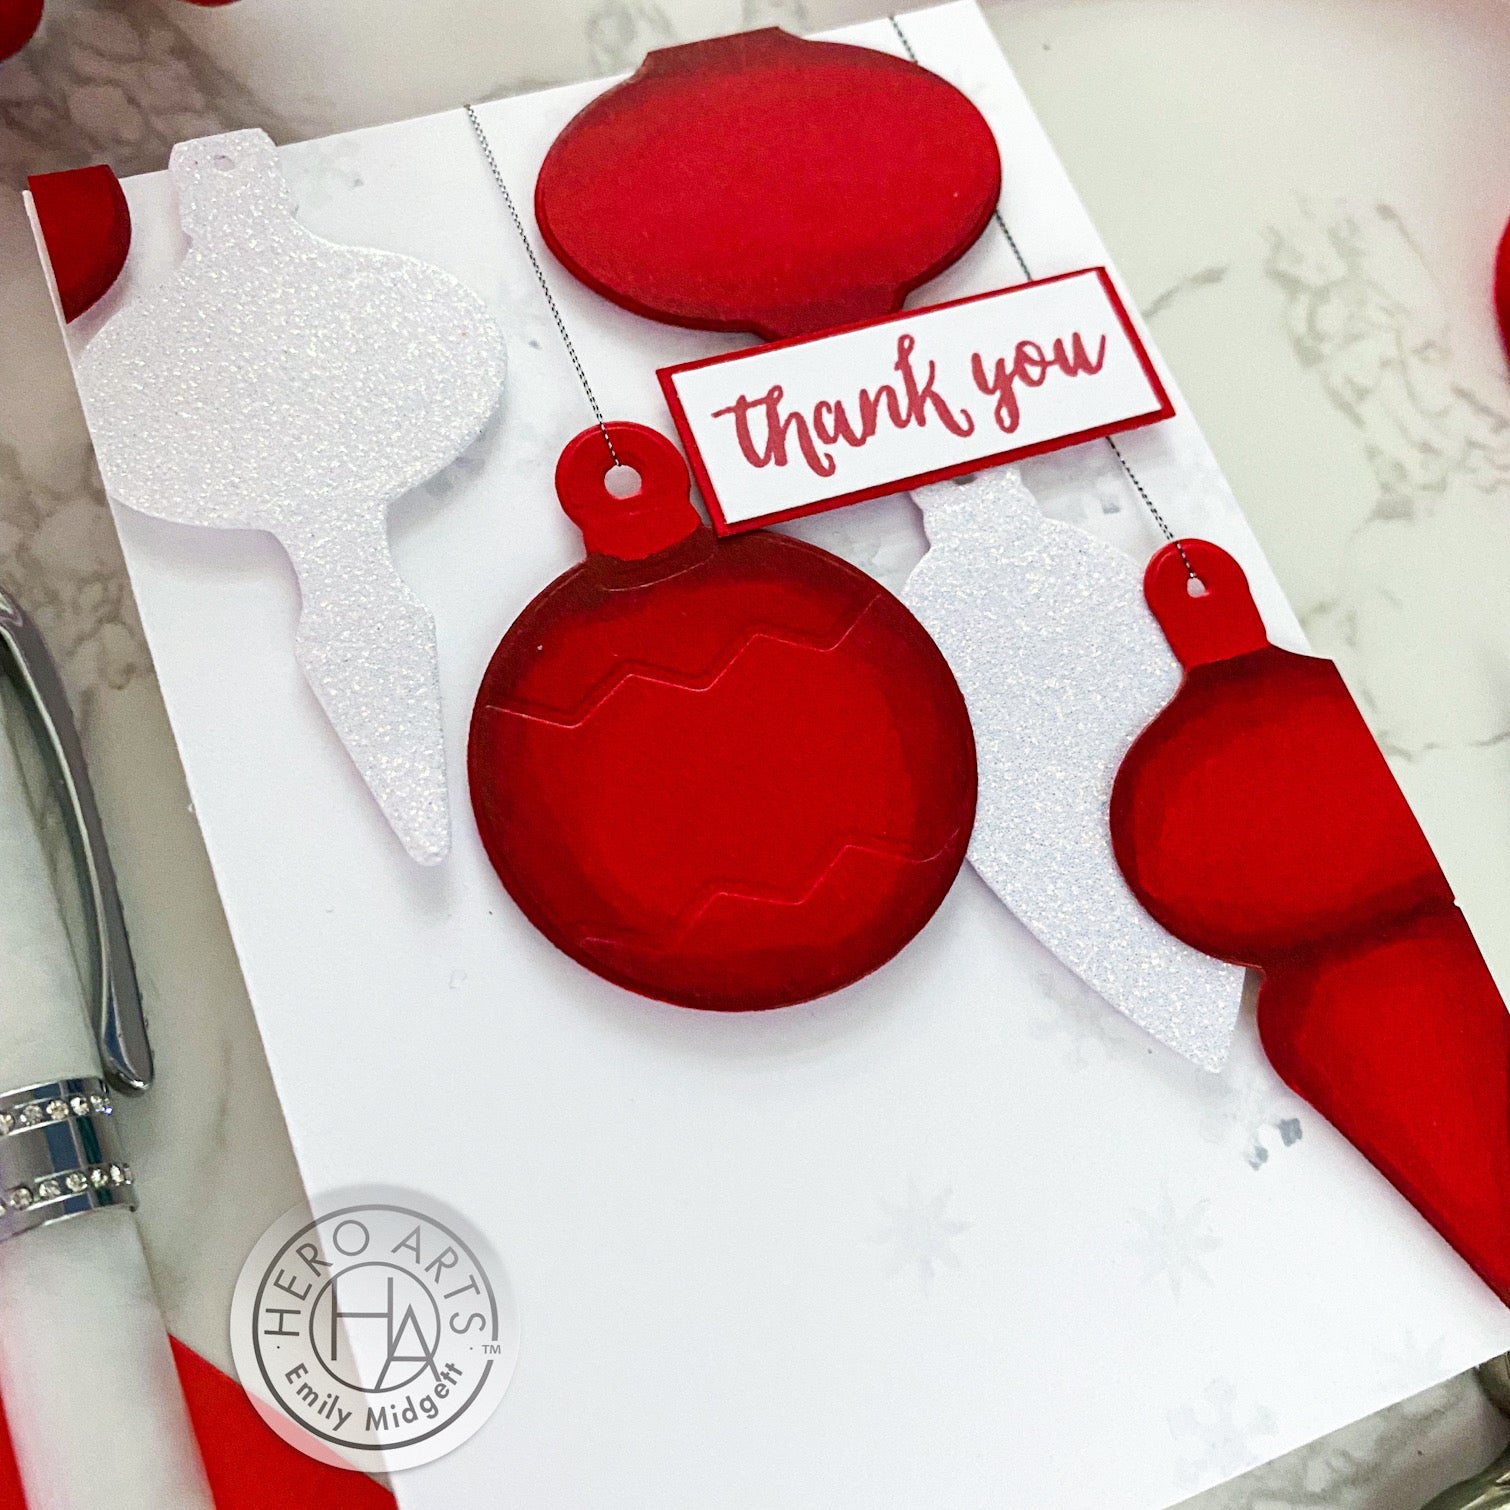
I trimmed down a panel of white cardstock to 3.5" x 5" (love this smaller size; the smaller canvas makes it quicker to fill up!) and arranged the die cuts in a cascade down the right hand side, trimming off the overhang wherever necessary. I threaded some silver thread through the little holes to allow them to "hang" from the mythical branch and adhered them all using foam adhesive for lots of dimension. I added a thank you sentiment from Unbearably Thankful, stamped on a strip of white cardstock using Red Royal ink and mounted on a slightly larger strip of Cherry cardstock for a mat, which allows the sentiment to pop a bit more off of the card front!

My second card features the lovely Looking Glass Ornaments dies. I die cut the ornament windows on two different panels of 4-bar sized white cardstock, using my first die cut piece as a guide for where to place my second die. A few light pencil marks on the cardstock allowed me to place my second die in exactly the correct spot so that everything would line up properly.

After the die cutting was complete, I used the same vivid red Copic markers to add shape and shadows to the individual ornaments. I adhered the finished colored panels together using Precision Glue, then backed the ornament window with some more white glitter paper from the Glitter Paper Basics pack to add a touch of festive sparkle. You can never have too much glitter around the holidays, in my opinion, and this white glitter paper is so beautifully sparkly but still quite subtle that I want to put it on absolutely everything. I added another sentiment from Unbearably Thankful, identical to the first project, using some foam adhesive to help it pop.
Well that's all for me today! I love how super simple it would be to pop these in an envelope to hand to a hostess with a bottle of wine. Thanks so much for reading, and have a marvelous day!

Click on products to shop:
|


Leave a comment
Please login with your Hero Arts account in order to comment.
Click HERE to sign up if you don't have an account.